Know about Headlight Wire Color Code to Replace Headlight Wiring
If your plug is corroded, melted or damaged, you need to replace your plug with a new one. To replace the headlight wires, one must be aware of the headlight wire color code to replace headlight wiring. You can buy different headlight wires from here. Unlike popular belief, there are no standard colors of headlight wires for each car. But different headlights can have different color codes. The color can vary depending upon the model and the year the car was made. The best way to determine the right wiring colors is to test the wires through a multi-meter or voltmeter. This will be well explained in the article. Each headlight has a low beam, high beam and ground that are represented by different colors. In this article, we will be covering up different color codes and their connections of headlight wires so you can replace them according to your convenience.
Headlight wiring provides power to your headlight bulb and if it becomes faulty, you can replace them. The wiring is connected to the base of the headlight bulb and also to the power distribution board in the engine. You don’t need to remove any part in order to replace your headlight wiring although the process can vary slightly depending upon the model of your vehicle. The replacement procedure takes about half an hour. The prior information about the wires and their color codes is really important for the connection. The article also discusses how we can change the headlight wiring. Following are some color codes for different headlights.
What are the color codes of different headlights?
Headwinds Headlights
Black = Ground
Yellow= Low beam
White= High beam
Trade winds Headlights
Black = Ground
Red/Black= Low beam
Red= High beam
U.S. Headlights
Black= Ground
Red/Black= Low beam
Red= High beam
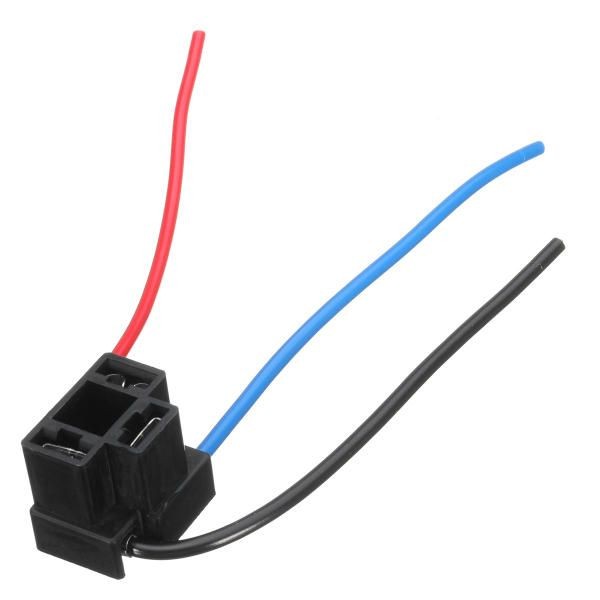
These are some headlights wires with their color code mentioned. The headwind headlights have yellow wire as a low beam positive, the white wire as a high beam and a black wire that represents ground while in the Trade wind headlights, the ground is represented by black, the low beam is represented by red and the high beam is also represented by the red color. The same goes for the U.S. headlights. Each model has a different color code for the wires. So, we have to figure out which one represents what. It is important to classify the wires into a low beam, high beam and the ground and then attach the wires. The ground wire is always attached to the left side of the headlight plug, the low beam wire is always attached in the middle and finally, the high beam wire is attached to the right side of the headlight plug. They should be connected in the following way:
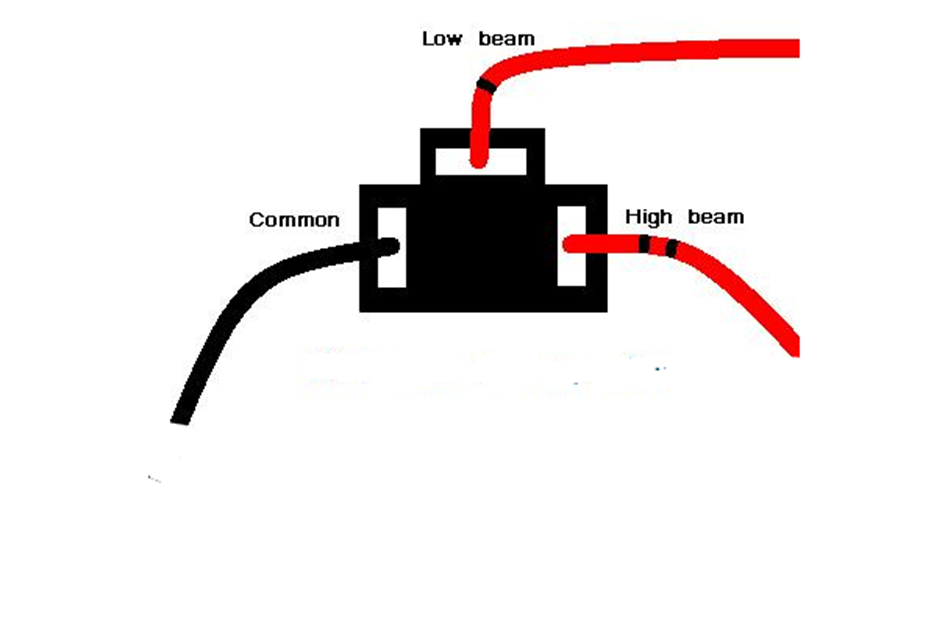
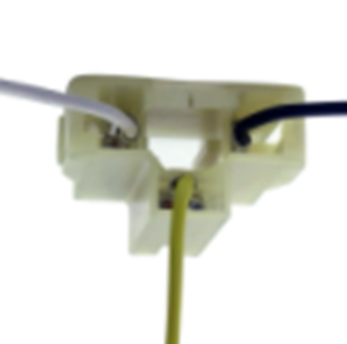
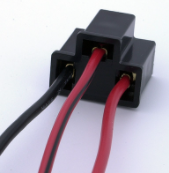
A typical H4 headlight plug looks like:
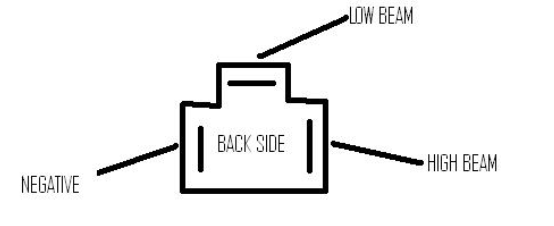
Here again, we can see that the negative is on the right side which corresponds to the ground or common while the low beam is in the middle and the high beam in the right side of the H4 headlight plug. The same generalized scheme is followed in other headlight plug designs.
How to test the wires by yourself?
You can also test the wires by yourself and get to know which one will be ground, negative or positive wire. For that, you need to get a quality multimeter that will help in the process of troubleshooting. The simplest way to check a positive wire of headlights will be to remove the plug that is connected to the headlight. Set your meter to 12- Volt DC. You may need to set it. You need to make sure that the leads are properly connected to the meter. Now, set your headlights on and dim the lights. Connect the black test lead to your vehicle frame having no rust or paint. Now, take the red test lead and connect it to one of the three holes of plug that was disconnected from the headlights of your vehicle. The meter should read around 12-13 volts. If it shows this reading that means it is a positive wire. However, if you don’t see any reading on the meter, that means the wire is negative and the high beam side of the headlight plug. Put the lights on a high beam and then repeat the entire process for 12 volts which will be positive for a high beam of the headlight. The last wire would be negative.
Therefore, if on the low beam the multi meter shows the reading of 12 volts, it means that is the low beam and it should be attached to the corresponding color. If the voltmeter/multi meter shows the reading of the high beam it means that the wire is a high beam and should be attached with its corresponding color. The wire will be left in the ground one. Through this, you can easily get to know which wire color corresponds to what and can easily headlight wire color code to replace headlight wiring.
How to wire the headlights?
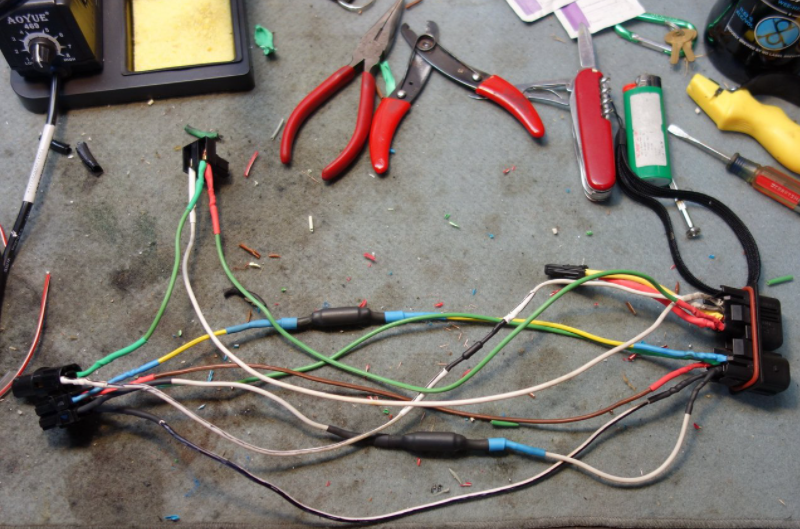
Let’s consider US headlights for wiring demonstration. In these headlights, one bulb will be for the low beam and one bulb for the high beam. The bulb used will be 9007. We will then wire from a 9007 to the H7 setup which is basically a Chinese version and has two separate bulbs for the low beam which are on the right side and the high beam which is in the middle. 9007 will have three wires. The high beam for 9007 will be on the left side, ground in the middle and low beam on the left side while the H7 setup will be having 4 wires. The ground wire and low beam wire goes to the bulb which is in the projector and there is another ground and high beam wire which goes the bulb from the middle side. The Chinese headlight will have a male socket present in the upper right-hand corner. It is basically a 4-wire locking connector that goes to the bulb present in the projector and the bulb in the middle. The green and yellow wires will be used for the bulb in the projector while the black and red wires will be for the bulb in the middle. The ground wire will be fed to the bulb in the projector and the middle. Similarly, the high beam will go to the middle while the low beam will go to the projector. Connect the 9007 Headlight Socket with wire leads to the 9007 female socket. Connect to the 9007 Headlight Pigtail Socket with wire leads. Then connect the yellow and black wire from the connector female socket to the black wire from the 9007 headlight socket. Connect the red wire from the female socket to the blue wire (high beam) of the 9007 headlight socket.
Finally, connect the green wire from the connector female socket to the red wire (low beam) of the headlight socket. Then, we have to cut the male socket of the Chinese headlight and connect it to auto illumination. At last, you have to connect the wires of the same colors. Finally, plug the 4-wire locking connector male to the female one and you have done your job! You have replaced your headlight wires. You can know more about it from this video given below.

Conclusion
If your plug is corroded, melted or damaged, you need to replace your plug with a new one. To replace the headlight wires, one must be aware of the headlight wire color code to replace headlight wiring. Unlike popular belief, there are no standard colors of headlight wires for each car. Different headlights can have different color codes. The color can vary depending upon the model and the year the car was made. The best way to determine the right wiring colors is to test the wires through a multi-meter or voltmeter. This will be well explained in the article. Each headlight has a low beam, high beam and ground that are represented by different colors. In this article, we will be covering up different color codes and their connections of headlight wires so you can replace them according to your convenience.
Headlight wiring provides power to your headlight bulb and if it becomes faulty, you can replace them. The wiring is connected to the base of the headlight bulb and also to the power distribution board in the engine. You don’t need to remove any part in order to replace your headlight wiring although the process can vary slightly depending upon the model of your vehicle. The replacement procedure takes about half an hour. The prior information about the wires and their color codes is really important for the connection. The article also discusses how we can change the headlight wiring. Following are some color codes for different headlights.
What are the color codes of different headlights?
Headwinds Headlights
Black = Ground
Yellow= Low beam
White= High beam
Trade winds Headlights
Black = Ground
Red/Black= Low beam
Red= High beam
U.S. Headlights
Black= Ground
Red/Black= Low beam
Red= High beam
These are some headlights wires with their color code mentioned. The headwind headlights have yellow wire as a low beam positive, the white wire as a high beam and a black wire that represents ground while in the Trade wind headlights, the ground is represented by black, the low beam is represented by red and the high beam is also represented by the red color. The same goes for the U.S. headlights. Each model has a different color code for the wires. So, we have to figure out which one represents what. It is important to classify the wires into a low beam, high beam and the ground and then attach the wires. The ground wire is always attached to the left side of the headlight plug, the low beam wire is always attached in the middle and finally, the high beam wire is attached to the right side of the headlight plug. They should be connected in the following way:
A typical H4 headlight plug looks like:
Here again, we can see that the negative is on the right side which corresponds to the ground or common while the low beam is in the middle and the high beam in the right side of the H4 headlight plug. The same generalized scheme is followed in other headlight plug designs.
How to test the wires by yourself?
You can also test the wires by yourself and get to know which one will be ground, negative or positive wire. For that, you need to get a quality multimeter that will help in the process of troubleshooting. The simplest way to check a positive wire of headlights will be to remove the plug that is connected to the headlight. Set your meter to 12- Volt DC. You may need to set it. You need to make sure that the leads are properly connected to the meter. Now, set your headlights on and dim the lights. Connect the black test lead to your vehicle frame having no rust or paint. Now, take the red test lead and connect it to one of the three holes of plug that was disconnected from the headlights of your vehicle. The meter should read around 12-13 volts. If it shows this reading that means it is a positive wire. However, if you don’t see any reading on the meter, that means the wire is negative and the high beam side of the headlight plug. Put the lights on a high beam and then repeat the entire process for 12 volts which will be positive for a high beam of the headlight. The last wire would be negative.
Therefore, if on the low beam the multi meter shows the reading of 12 volts, it means that is the low beam and it should be attached to the corresponding color. If the voltmeter/multi meter shows the reading of the high beam it means that the wire is a high beam and should be attached with its corresponding color. The wire will be left in the ground one. Through this, you can easily get to know which wire color corresponds to what and can easily headlight wire color code to replace headlight wiring.
How to wire the headlights?
Let’s consider US headlights for wiring demonstration. In these headlights, one bulb will be for the low beam and one bulb for the high beam. The bulb used will be 9007. We will then wire from a 9007 to the H7 setup which is basically a Chinese version and has two separate bulbs for the low beam which are on the right side and the high beam which is in the middle. 9007 will have three wires. The high beam for 9007 will be on the left side, ground in the middle and low beam on the left side while the H7 setup will be having 4 wires. The ground wire and low beam wire goes to the bulb which is in the projector and there is another ground and high beam wire which goes the bulb from the middle side. The Chinese headlight will have a male socket present in the upper right-hand corner. It is basically a 4-wire locking connector that goes to the bulb present in the projector and the bulb in the middle. The green and yellow wires will be used for the bulb in the projector while the black and red wires will be for the bulb in the middle. The ground wire will be fed to the bulb in the projector and the middle. Similarly, the high beam will go to the middle while the low beam will go to the projector. Connect the 9007 Headlight Socket with wire leads to the 9007 female socket. Connect to the 9007 Headlight Pigtail Socket with wire leads. Then connect the yellow and black wire from the connector female socket to the black wire from the 9007 headlight socket. Connect the red wire from the female socket to the blue wire (high beam) of the 9007 headlight socket.
Finally, connect the green wire from the connector female socket to the red wire (low beam) of the headlight socket. Then, we have to cut the male socket of the Chinese headlight and connect it to auto illumination. At last, you have to connect the wires of the same colors. Finally, plug the 4-wire locking connector male to the female one and you have done your job! You have replaced your headlight wires. You can know more about it from this video given below.